Lower back pain is one of the most common complaints among office workers and remote teams. This article explores how proper ergonomic desk setup and targeted desk stretches can prevent and relieve lumbar discomfort. You’ll learn why pain develops, specific adjustments for chairs and monitors, a practical daily stretching routine, and when to seek professional care to stay productive and pain-free.
Understanding why lower back pain happens at the desk
That nagging ache in your lower back after a day at the desk isn’t just in your head. It’s a predictable result of a mismatch between our bodies, designed for movement, and our modern work environment. In the United States, lower back pain is a massive issue, affecting around 60% of office workers each year and hitting the 30-50 age group particularly hard. This isn’t just about discomfort; it costs the U.S. economy billions in lost productivity annually, with presenteeism, or working while in pain, slashing an individual’s output by up to 40%. Understanding the mechanics of why this happens is the first step toward fixing it.
When you sit, especially for long periods, the pressure on your lumbar discs increases by about 40% compared to standing. If you slouch, that pressure can nearly double. This constant compression starves the discs of healthy circulation and can accelerate wear and tear. The real problem starts with posture. The natural S-curve of your spine, with a slight inward curve in the lower back called lordosis, is your body’s shock absorber. Slouching in a chair reverses this curve, creating a C-shape instead. This flattens the lumbar spine, strains the ligaments that support it, and puts the discs under uneven, damaging pressure.
This slumped posture triggers a chain reaction. Your pelvis, which should be in a neutral position, tilts backward. This has two major consequences. First, your hip flexors, the muscles at the front of your hips, are held in a shortened position for hours. They become tight and stiff, pulling your pelvis forward and down when you finally stand up, further straining your lower back. Second, your gluteal muscles, which are essential for stabilizing your pelvis and supporting your spine, effectively go to sleep. This phenomenon, known as gluteal inhibition, happens because they aren’t being asked to do any work. Your body learns to rely on smaller, less suitable muscles like your hamstrings and lower back extensors to do the job of the glutes, leading to overuse and pain. Add a weak core into the mix, and your spine is left without its primary support system, vulnerable to strain from simple movements.
Several risk factors in your workspace make this worse. A chair without proper lumbar support forces your spine into that damaging C-curve. A monitor that’s too low or too high causes you to crane your neck, which throws off your entire spinal alignment. The biggest culprit, however, is simply staying still. Static postures held for more than 20-30 minutes at a time significantly increase your risk. Insufficient breaks and long commutes just add more hours to your total “seat time,” compounding the problem.
It’s important to know what kind of pain you’re dealing with. Most desk-related back pain is mechanical. It feels like a dull, persistent ache in the lower back that gets worse the longer you sit and often feels better when you stand up or walk around. However, there are a few red flags that mean you should see a doctor right away. These include back pain accompanied by a fever, sudden and severe numbness or weakness in your legs, or any changes in bowel or bladder control. These are not typical symptoms of mechanical back pain and require urgent medical evaluation.
The good news is that for mechanical pain, ergonomic adjustments and targeted stretches are incredibly effective. Ergonomics works by setting up your environment to support your body’s natural posture, reducing the mechanical stress on your spine. Stretches actively counteract the negative effects of sitting by lengthening tight muscles like the hip flexors and reactivating dormant ones like the glutes.
You can do a few quick self-checks right now to see where you stand.
- The 90-Degree Rule.
Sit with your back against your chair. Your elbows should be at a roughly 90-degree angle when your hands are on your keyboard, and your knees should also be at about a 90-degree angle with your feet flat on the floor. - The Sightline Test.
Look straight ahead. The top of your monitor screen should be at or slightly below your eye level. If you have to look up or down, it’s positioned incorrectly. - The Pelvic Tilt Test.
While seated, try to gently rock your pelvis forward and backward. Can you easily tuck your tailbone under you (a posterior tilt) and then arch your lower back slightly (an anterior tilt) without pain or significant stiffness? If not, your pelvic mobility is likely restricted.
These simple checks can reveal the root causes of your discomfort. But it’s important to remember that while ergonomics and stretching are powerful tools, they may not be enough if pain persists for more than four to six weeks, is severe, or radiates down your leg. In those cases, a professional medical evaluation should be your priority.
Setting up an ergonomic desk to protect your lower back
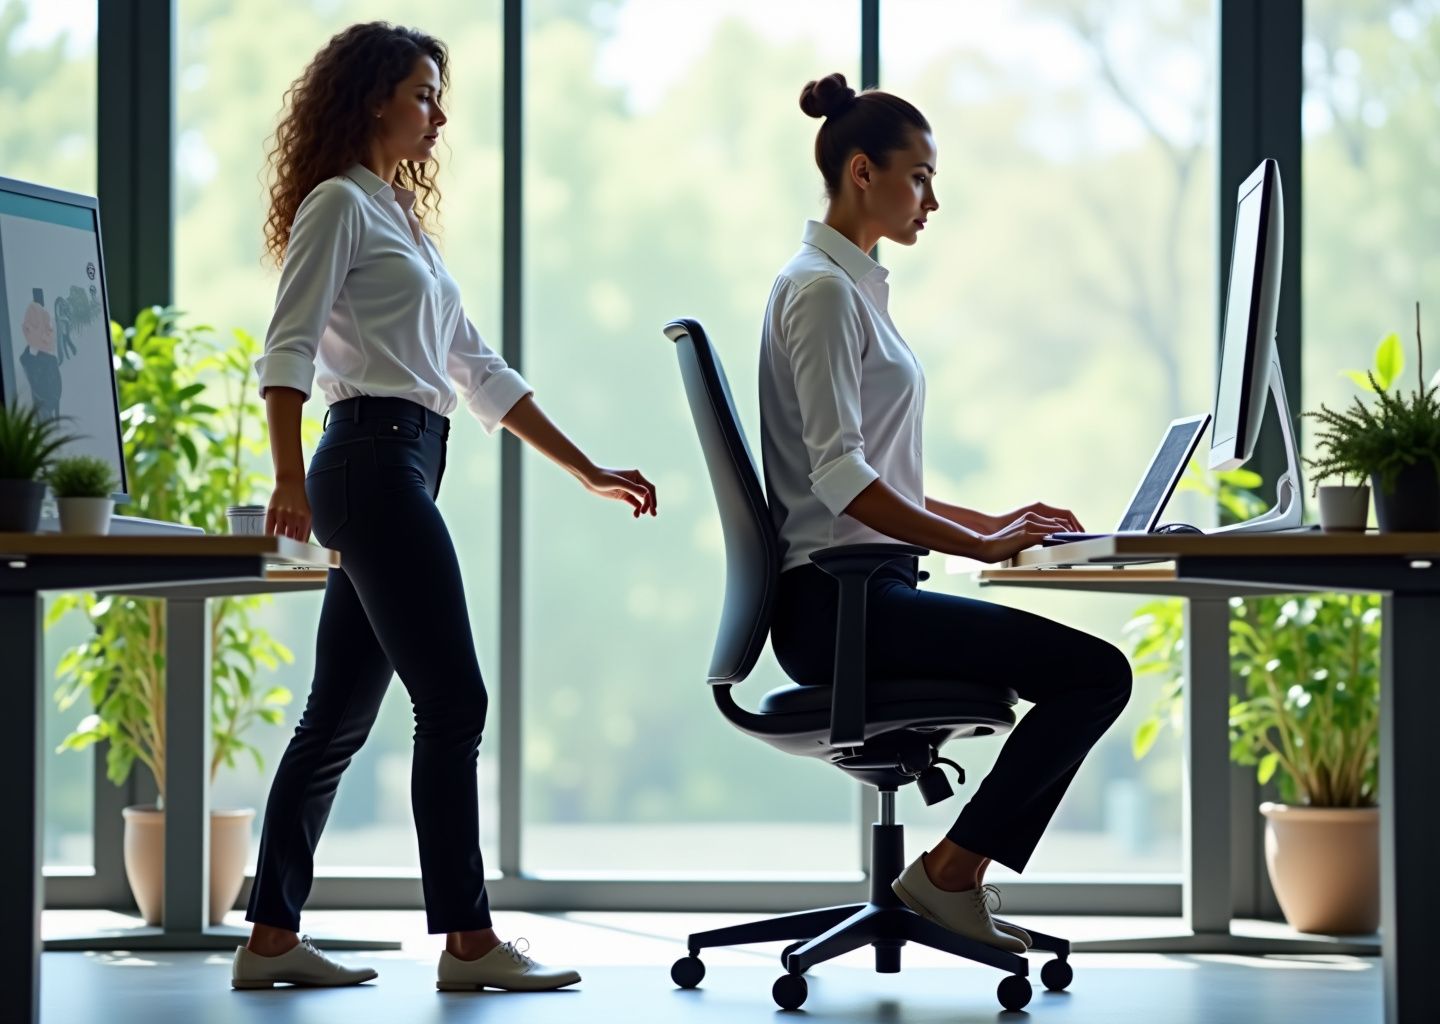
Your desk setup is not just furniture; it’s the environment where your spine spends thousands of hours a year. Getting it right is the most critical step in preventing the lower back pain we discussed. An ergonomic setup isn’t about expensive gear, it’s about adjusting what you have to fit your body. Let’s build your pain-free workstation from the ground up.
Start with your chair, the command center of your desk.
- Chair Height and Knees.
Adjust the height so your feet rest flat on the floor with your thighs roughly parallel to it. Your knees should be at or slightly below the level of your hips, forming an angle of 90 to 110 degrees. This position stabilizes your pelvis and prevents the forward slump that strains your lumbar discs. If you’re shorter and your feet dangle, use a footrest. This simple tool reduces pressure on your thighs by 25%, improving circulation and back support. - Seat Depth.
Sit back fully in your chair. You should be able to fit two to four fingers between the back of your knees and the edge of the seat. If the seat is too deep, it will press against your calves and encourage slouching. If it’s too shallow, your thighs won’t be supported. - Lumbar Support.
Your lower back has a natural inward curve (lordosis). The backrest of your chair should support this. Adjust the lumbar support so it fits snugly into the curve of your lower back, typically around your belt line. It should feel supportive, not pushy. This simple adjustment can restore about 10 degrees of healthy lordosis, taking significant pressure off your spinal ligaments. - Armrests.
Set your armrests so your shoulders are relaxed and your elbows are bent at a comfortable 90 to 100-degree angle. Armrests that are too high will hunch your shoulders, while those too low will cause you to lean. Proper adjustment can reduce muscle activity in your upper back and neck by up to 50%.
With your body properly supported, let’s position your tools. Your monitor, keyboard, and mouse dictate your upper body posture, which directly impacts your lower back.
- Monitor Position.
The top of your monitor screen should be at or slightly below your eye level. A monitor that’s too high or too low forces you to tilt your head, creating a forward head posture that adds immense strain down your entire spine. Position the monitor about an arm’s length away, typically 20 to 30 inches. For multi-monitor setups, place your primary screen directly in front of you and secondary screens to the side, angled slightly inward. - Keyboard and Mouse.
Place your keyboard and mouse close enough to you that you can use them with your elbows bent at that 90-degree angle, close to your body. Your wrists should be straight and neutral, not bent up, down, or to the sides. This prevents strain that can travel up your arms to your shoulders and back.
If you use a sit-stand desk, your setup needs to be correct in both positions. For standing, adjust the desk height until your elbows are again at a 90-degree angle with relaxed shoulders. Your monitor may need to be raised an additional 4 to 6 inches to maintain eye level. Always use an anti-fatigue mat. Standing on a hard surface can be just as bad as sitting poorly; a good mat reduces spinal compression and fatigue by over 50% after just two hours. The goal is to alternate between sitting and standing, aiming for about 20-30 minutes of standing per hour.
These principles apply to everyone, but some situations require special attention.
- Laptop-Only Workers.
Working directly on a laptop is an ergonomic disaster, forcing you to choose between proper screen height and proper keyboard height. The solution is non-negotiable for full-time work: get an external keyboard, a mouse, and a laptop stand or monitor riser. This allows you to position the screen at eye level and the keyboard at elbow height. - Remote and Hot-Desk Environments.
For home offices, you don’t need a fancy chair. A rolled-up towel or a small cushion can serve as an effective lumbar support. A stack of sturdy books is a perfect monitor riser. In shared offices, familiarize yourself with the chair and desk adjustment levers. Look for equipment with memory presets, a feature becoming standard in 2025 that allows you to save your ideal heights.
Finally, employers can play a huge role. Providing adjustable equipment and offering professional ergonomic assessments can reduce workplace injuries by over 60%. A modest equipment stipend for remote workers often yields a 300% ROI in productivity and reduced absenteeism. But remember, even a perfect setup is static. It’s a platform for good posture, but it must be combined with movement. Use your ergonomic setup as a home base, but plan to leave it often with microbreaks and the stretches we’ll cover in the next chapter.
Daily desk stretching routine for lower back pain relief
Now that your desk is set up to support your spine, the next step is to actively counteract the stress of sitting with a consistent movement routine. An ergonomic chair is a fantastic start, but even the best setup can’t replace the body’s need for regular motion. This daily stretching plan is designed to be progressive, practical, and easy to fit into your workday, whether you’re in a busy office or working from home.
Before you begin, a quick note on safety. Always move gently and avoid any sharp, shooting, or radiating pain. If you feel anything more than a mild stretch, ease off. Your breath is your guide; inhale as you prepare and exhale as you deepen the stretch. Never hold your breath. If you have an acute injury, have recently had surgery, or experience severe pain, please consult a physical therapist or doctor before starting any new routine. A simple one-minute warm-up, like marching in place or doing gentle arm circles, is a great way to prepare your muscles.
The Core 10-Minute Desk Routine
Perform this routine once in the mid-morning and again in the mid-afternoon to break up long periods of sitting.
-
Seated Pelvic Tilt
Sit at the edge of your chair with feet flat on the floor. Place your hands on your hips. Inhale and arch your lower back, tilting your pelvis forward (anterior tilt). Exhale and gently round your lower back, tucking your tailbone under (posterior tilt). This is a small, controlled movement focused on the low back. Hold each position for 3-5 seconds. Repeat for 10 cycles. Perform 1 set. -
Seated Cat-Cow
Remain seated with hands on your knees. On an inhale, arch your entire spine, look up, and draw your shoulders back (Cow). On an exhale, round your spine, drop your chin to your chest, and press your mid-back toward the back of the chair (Cat). Flow between the two poses for 8 full breath cycles. Perform 1 set. -
Seated Spinal Twist
Sit tall and place your left hand on the outside of your right knee. Place your right hand on the chair behind you for support. Inhale to lengthen your spine, and exhale to gently twist your torso to the right. Keep your hips facing forward. Hold for 20-30 seconds, breathing deeply. Repeat on the left side. Perform 2 reps per side. -
Seated Figure-Four Stretch
Cross your right ankle over your left knee, keeping your right foot flexed to protect the knee. Sit tall and gently press down on your right knee to feel a stretch in your right glute and hip. For a deeper stretch, hinge forward at your hips with a straight back. Hold for 30 seconds. Repeat on the other side. Perform 2-3 sets per side. -
Standing Hip Flexor Lunge
Stand up and step your left foot back into a lunge position. Keep your back leg straight and gently bend your front knee. Tuck your pelvis under to feel a stretch in the front of your left hip. For support, you can hold onto your desk. Hold for 30-40 seconds. Repeat on the other side. Perform 2 reps per side. -
Standing Hamstring Stretch
Stand facing your chair. Place your right heel on the seat of the chair with your leg straight. Keeping your back straight, hinge forward at your hips until you feel a gentle stretch in the back of your right thigh. Hold for 30 seconds. Switch legs. Perform 2 reps per side. -
Gentle Standing Back Extension
Stand with your feet shoulder-width apart and place your hands on your lower back for support. Gently press your hips forward and arch your back, looking slightly upward. Only go as far as feels comfortable. Hold for 5-10 seconds. Repeat 5-8 times.
Mobility and Strengthening Micro-Exercises
Integrate these short drills to build long-term resilience. Add them to your routine or do them during microbreaks.
-
Hip Mobility
While standing and holding your desk for balance, lift one knee and make slow, controlled circles with your hip, 10 times in each direction. Switch legs. -
Strengthening 1 Glute Squeezes
While seated or standing, simply squeeze your gluteal muscles firmly. This helps reactivate muscles that turn off during prolonged sitting. Hold for 5-10 seconds. Repeat 10-15 times. -
Strengthening 2 Bird-Dog Prep
Stand behind your chair and place both hands on the backrest. Extend your right arm forward and your left leg straight back, keeping your core tight and your back flat. Hold for 5 seconds. Repeat 8-10 times per side.
Sample Schedule and Modifications
Consistency is more important than intensity. Aim for a schedule that works for you.
- Microbreaks Every 30 minutes, stand up, walk around, or do one or two of the stretches above for 1-2 minutes.
- Full Routine Perform the 10-minute core routine twice daily.
- Post-Work Session Consider a longer 20-30 minute session after work, holding stretches longer and adding more strengthening reps.
Modifications are key. For those with limited mobility or older adults, perform all exercises seated and with smaller movements. If you are pregnant, avoid deep twists and lying on your back; focus on gentle pelvic tilts and cat-cow. For disc herniation, it’s crucial to follow clinical guidance. Many find that extension-based movements (like the standing back extension) feel better than forward-bending (flexion) stretches. Avoid any movement that increases leg pain or numbness.
You can be discreet. Seated pelvic tilts and glute squeezes are nearly invisible during meetings. Use your standing desk as a trigger; every time you stand, do a hip flexor lunge. To track progress, rate your pain on a simple 0-10 scale each week and note any improvements in your ability to move freely. You should notice a positive difference within 2 to 6 weeks.
Frequently asked questions about desk stretches and ergonomics
After learning a new stretching routine, it’s natural to have questions about how to apply it safely and effectively in your daily life. This section addresses the most common queries we hear from office workers and managers. It’s designed to provide quick, practical answers to help you integrate these new habits.
Can stretching make my back pain worse?
Yes, it can if done improperly or if you have an underlying condition that requires specific care. Stretching should create a feeling of gentle release, not sharp pain. If a stretch causes sharp, shooting, or radiating pain, or if your pain level increases beyond a 5 on a 10-point scale, stop immediately. Pushing through sharp pain can aggravate an injury. If your pain consistently worsens with stretching, it’s time to consult a physical therapist for a proper diagnosis.
Are strengthening exercises necessary, or is stretching enough?
Stretching is fantastic for temporary relief and improving flexibility, but it’s only half the equation. Strengthening is essential for long-term spinal health. Weak core and glute muscles fail to support your spine, forcing your lower back to overcompensate. A 2023 meta-analysis confirmed that combining stretching with strengthening exercises reduces the recurrence of lower back pain by up to 50% compared to stretching alone. The glute squeezes and bird-dog prep from the routine are a great starting point.
Can I do these stretches with a herniated disc or sciatica? What modifications are safe?
You must consult a physical therapist or doctor before starting any routine with these conditions. They can provide a specific diagnosis and guide you. Generally, individuals with a lumbar disc herniation may find relief with gentle extension-based exercises (like the standing back extension) and may need to avoid deep forward bending (flexion). For sciatica, aggressive hamstring stretches or deep spinal twists can sometimes worsen nerve irritation. A professional can teach you safe modifications, such as nerve glide exercises.
How can I discreetly stretch during meetings or on video calls?
Focus on small, subtle movements that won’t draw attention. Seated pelvic tilts, ankle circles, and gently pressing your knees outward against your hands are nearly invisible. You can also perform shoulder shrugs and rolls, gently turn your head from side to side, or clench and release your glute muscles. Even these small movements help increase blood flow and prevent stiffness.
Are posture trackers and posture reminders effective?
They can be very effective as tools for building awareness, but they are not a cure. Posture reminder apps are excellent for breaking the habit of sitting statically for too long. Wearable posture trackers that vibrate when you slouch can provide real-time feedback to help you build better habits; some studies show they can reduce slouching by up to 40% in a few weeks. However, their effectiveness depends on you also having a proper ergonomic setup and incorporating regular movement.
Conclusions and next steps to stay pain free at work
You’ve now learned the key ergonomic principles and stretching techniques to combat lower back pain. The real challenge is turning this knowledge into lasting habits. Lasting change doesn’t come from a single, drastic overhaul. It comes from small, consistent actions that build on each other over time. This is your roadmap to integrating these practices into your work life, starting today. Think of it not as a finish line, but as a sustainable system for staying comfortable and productive.
Your journey to a pain-free workday begins with a few simple, powerful adjustments. Here is your action plan, broken down into immediate steps and longer-term goals.
Your Action Plan for a Healthier Back
The First Week Checklist. Immediate Actions
Focus on these four foundational steps this week. They require minimal effort but deliver the most significant initial impact.
- Adjust Your Chair and Monitor. This is non-negotiable. Set your chair height so your feet are flat on the floor and your knees are at a 90-degree angle. Your monitor’s top edge should be at or slightly below eye level to keep your neck and spine neutral.
- Add Lumbar Support. If your chair lacks built-in support, roll up a towel and place it in the small of your back. This simple fix helps maintain your spine’s natural curve, reducing disc pressure by a noticeable margin.
- Schedule Microbreak Reminders. Use your phone or a desktop app to set a recurring reminder every 30 minutes. When it goes off, simply stand up, walk around for a minute, or do a single stretch. Breaking up static posture is critical.
- Perform the 10-Minute Routine Once Daily. Commit to doing the full stretching routine just once a day. Attach it to an existing habit, like your morning coffee or right after you log off. Consistency is more important than intensity at this stage.
The First Month. Building Momentum
Once you’ve established the basics, you can start building strength and refining your setup.
- Integrate Strengthening Exercises. Stretching improves flexibility, but strength provides stability. Add simple core exercises like planks, bird-dogs, and glute bridges to your routine three times a week. A strong core is essential for supporting your lower back and can reduce pain recurrence by up to 50%.
- Arrange a Formal Ergonomic Assessment. Many companies offer virtual or in-person ergonomic assessments. Take advantage of this. An expert can spot issues you might miss and provide personalized recommendations. These assessments are proven to significantly reduce workplace injuries.
The First Three Months. Long-Term Solutions
After a couple of months, you’ll have a clearer picture of what works for you. Now is the time to consider bigger investments if pain persists.
- Consider a Sit-Stand Desk. If you still struggle with pain from prolonged sitting, a sit-stand desk could be a valuable tool. Studies show that alternating between sitting and standing (a 2 to 1 ratio is a good start) can reduce lower back pain by over 30%.
- Upgrade Your Equipment. If your assessment revealed that your chair or keyboard is contributing to your pain, it’s time to advocate for better equipment. A truly ergonomic chair is an investment in your health and productivity.
How to Track Your Progress and When to Seek Help
To stay motivated, you need to see results. Keep a simple pain journal, rating your discomfort on a 0-10 scale each day. Note which activities or stretches provide relief. Also, set functional goals. Maybe your goal is to sit through a 90-minute meeting without squirming or to be able to play with your kids on the floor without pain. These real-world victories are powerful motivators.
While these strategies are effective for most mechanical back pain, they are not a substitute for medical advice. You should consult a healthcare professional if your pain is severe, persists for more than four to six weeks despite these efforts, or is accompanied by neurological symptoms like radiating leg pain, numbness, weakness, or changes in bowel or bladder control.
A Note for Managers and Team Leads
You play a crucial role in your team’s well-being. Fostering an ergonomic culture is one of the most impactful investments you can make, especially with hybrid work models becoming standard. Encourage and normalize stretch breaks during meetings. Lead by example. Consider providing a modest equipment stipend ($200-$500) for home office setups, offering access to virtual ergonomic assessments, and fostering a culture where taking movement breaks is encouraged. The return on investment in productivity and reduced absenteeism is well-documented. As workplace design evolves, supporting your team’s physical health is no longer a perk but a necessity for a resilient and effective workforce. For more insights, you can explore emerging ergonomic trends that prioritize employee well-being. By taking these proactive steps, you build a foundation of trust and support that empowers your team to do their best work, pain-free.
References
- Office Ergonomic Trends and Predictions for 2025 — Discusses 2025 trends including employee-centric and sustainable workplace design.
- The Evolution of Ergonomics: Trends to Watch in 2025 — Examines the evolution of ergonomics and the link between ergonomic improvements and productivity.
- Office Ergonomics Trends for 2025: What's New in Workplace Design? — Covers 2025 ergonomic trends such as flexible workspaces, personalized furniture, and technology integration.
- Employee Productivity Statistics – BOSTONtec — Provides statistics on the impact of ergonomic workstations on employee productivity and cycle times.
- How Ergonomics Will Shape Workspaces in 2025 – Lofty Furniture — Predicts a focus on comfort and productivity in 2025 through AI, smart furniture, and flexible setups.
- Workspace Trends of 2025 – Kensington — Highlights key workspace trends and innovative ergonomic products for the current year.
- The Ultimate Guide to Office Ergonomics for Workplace EHS — A guide to office ergonomics focusing on health and safety principles for 2025.
- Adaptability, ergonomics and wellbeing: building blocks for the … — Discusses the role of adaptability, ergonomics, and wellbeing in modern workplace design.
- Office Trends for 2026: Ergonomic Solutions for a Changing … — Cites workforce survey data on the prevalence of hybrid work and its implications for ergonomic solutions.
- 2025 Office Trends: What's Changing – Madison Liquidators — Reviews 2025 office trends, including the adoption of sit-stand desks and ergonomic seating.
Legal Disclaimers & Brand Notices
Medical Disclaimer and Liability
The content of this article, including all information regarding ergonomic setups, stretching routines, pain management, and when to seek professional care, is provided for informational purposes only. It is not intended to be a substitute for professional medical advice, diagnosis, or treatment from a qualified healthcare provider, such as a physician or licensed physical therapist. Always seek the advice of your doctor or other qualified health professional with any questions you may have regarding a medical condition, injury, or before starting any new exercise or wellness program.
If you experience sharp, shooting, or radiating pain, or if your symptoms include numbness, weakness, or changes in bowel or bladder control, seek immediate medical attention. Reliance on any information provided by this article is solely at your own risk.
Trademark and Brand Acknowledgment
All product names, logos, and brands mentioned or referenced in the context of general ergonomic equipment are the property of their respective owners. The use of these names, logos, and brands does not imply endorsement.